Tracker installation
Server Requirements
| Parameter | Description | Note |
|---|---|---|
| Server type | Dedicated / VPS / VDS | Classic web hostings and shared hostings will not work. |
| CPU (cores/threads) | 1 | Performance per thread is more important than the amount of threads. |
| RAM (GB) | 2 | |
| Storage type | SSD | Poor performance on HDD. |
| OS | Minimum: Debian 11.x minimal Ubuntu 22.04 minimal Recommended: Debian 12.x minimal Ubuntu 22.04 minimal |
CentOS/RHEL and LAMP-distributions are allowed if installing manually. Ubuntu 22.10\23.10 is not supported. |
| Virtualization | KVM | File problems may occur on OpenVZ virtualization. |
Automatic installation
The automatic installation allows you to install all the necessary software along with the tracker and optimize it for your server in 60 minutes. Do not try to install the tracker with autoinstaller, if you already have work projects on your server. Install only on a clean server.
If you want to install the tracker on a web panel (which we strongly recommend against), check out the manual installation.
First, you need to connect to your server. Depending on your OS, this can be done in different ways:
-
Connecting to the server
-
Windows
1. Download Putty
2. Start it, in the Host Name (or IP address) field enter your IP, click Open
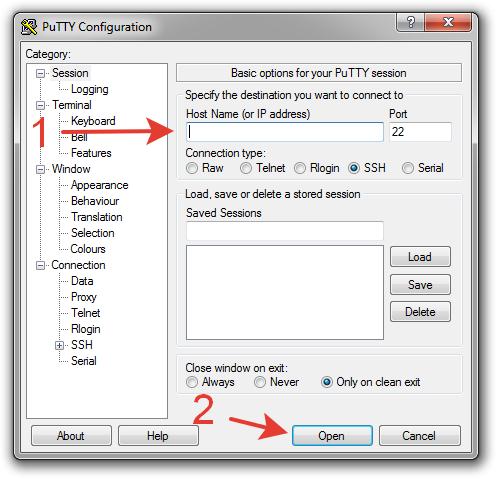
3. In the pop-up window click Yes
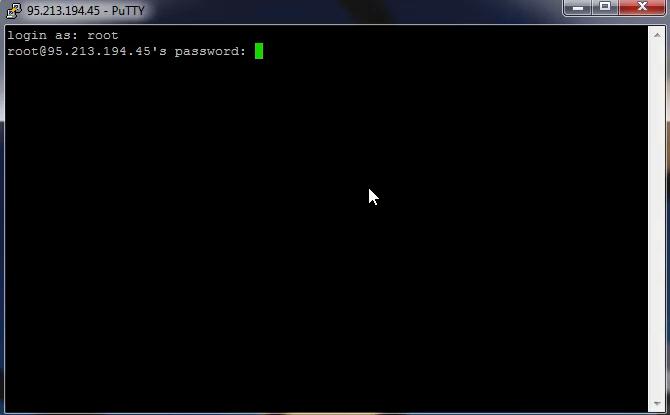
4. Enter your login/password (input characters will not be shown on the screen). You can simply copy your password and paste it into Putty by clicking the right mouse button:
-
Mac OS
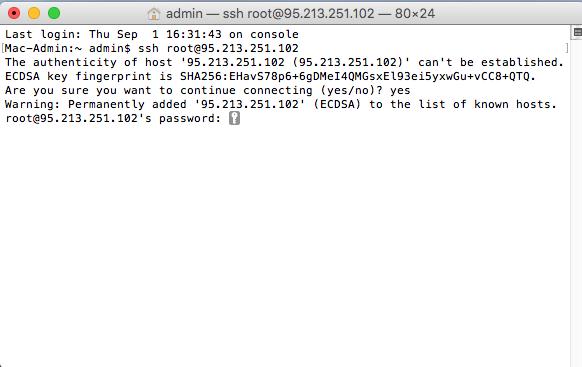
1. Open Terminal
2. Execute:
login — your loginssh login@IP
IP — IP of your server
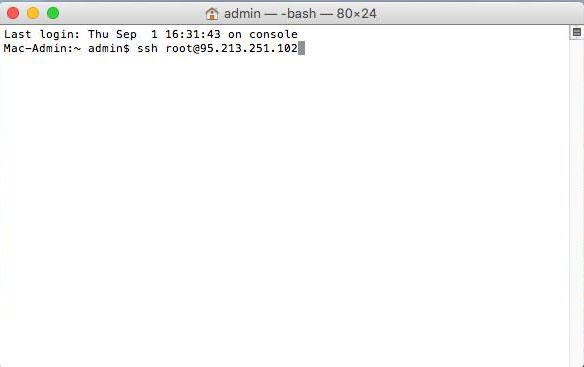
3. Type yes and press Enter
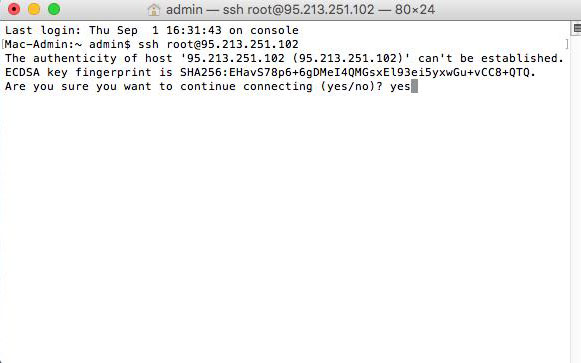
4. Enter SSH password (input characters will not be shown on the screen), press Enter
-
Windows
-
Auto installation step by step
-
1. Execute:
wget http://data.binom.org/binom_install.sh -O /root/binom_install.sh
2. Execute:
bash /root/binom_install.sh install
3. Now you need to enter a domain for the tracker, which you'll use to enter the tracker, and for your campaign links.
If your domain is already linked with the server, the installer will automatically configure an SSL for it. If it is not linked yet, the tracker will be available only via http.
If you don't have a domain, you can use an IP address of your server, but in this case you won't be able to log into the tracker via https.
4. Enter your valid email address

5. Select the time zone for the tracker

6. When the installation is complete, you'll see the access data to the tracker. Make sure to save this data. It's generated automatically and can't be recovered:

-
VIDEO
Manual installation
| Software | Minimum | Recommended | Note |
|---|---|---|---|
| Web Server | Nginx 1.6.8 Apache2 2.2 |
Nginx 1.20 | Normally Nginx works faster and consume less resources |
| PHP Handler | PHP7.4-FPM | PHP7.4-FPM | With the PHP module for Apache2 some of the tracker functionalily won't work |
| PHP | 7.4 | 7.4 | We can't guarantee stable work with 8+. Required extensions: php-pdo php-mysqlnd php-mbstring php-ioncube php-curl php-zip php-xml php-posix php-ssh2 php-openssl php-pear php-dev |
| MySQL | 5.7.10 | Percona 5.7.40 | Not compatible with MariaDB |
| whois | 5.4.3 | 5.4.3 | |
| GRPC | 1.44 | 1.47 |
-
Manual installation step by step
-
1. Make sure that the software on your server meets the requirements. If any component is missing, you need to install it:
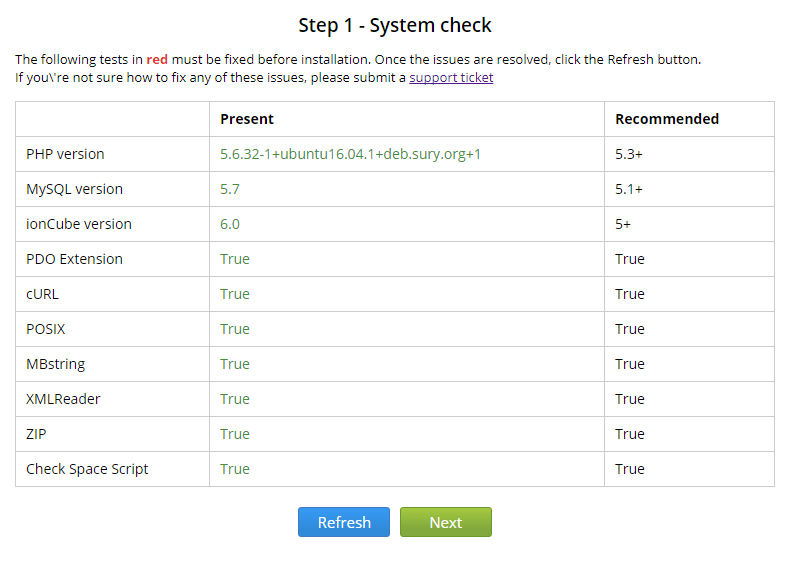
2. Set the permissions on the tracker files, so that the tracker could work and update correctly by itself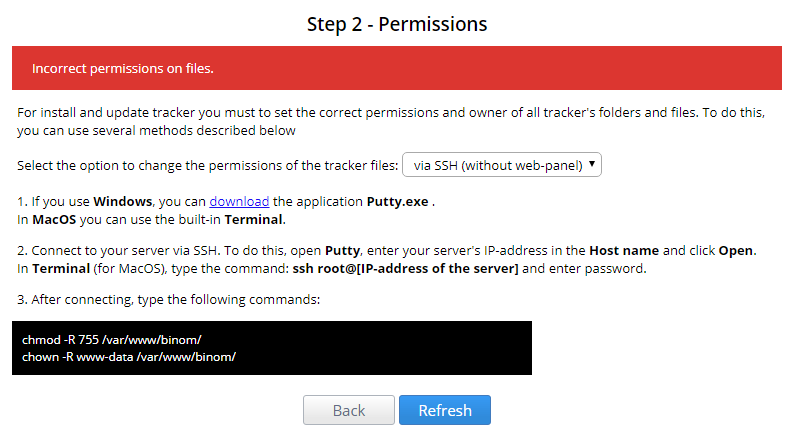
3. Fill in the fields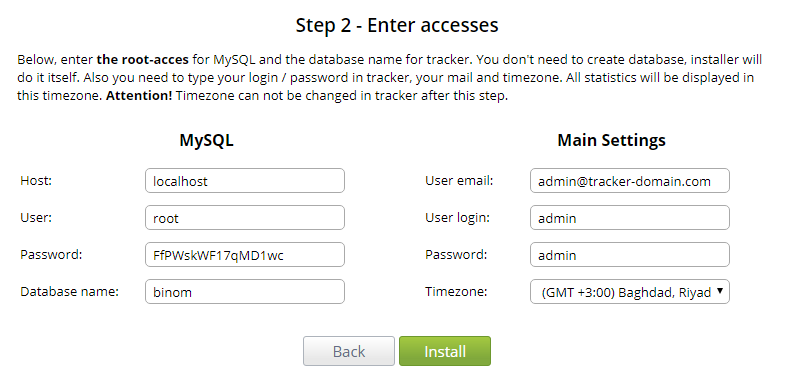
Make sure that the user has super privileges, so the tracker could restore global parameters for when MySQL restarts
4. Depending on your server’s hardware and location, the installation can take up to 10 minutes
5. Click Finish and enter your login/password (specified during the third step)
-
INSTALLATION ON A WEB PANEL
It's possible to install the tracker on ISP/Plesk/Vesta/cPanel web panel, but we strongly recommend against it, if you don't know how to optimize it correctly.
Almost all the panels need a better software to be installed on, as well as additional configuration for optimal tracker operation. Most panels use default settings, which can result in traffic loss, long reports loading, and reduced tracker functionality.
FastPanel and ServerPilot are not supported by the tracker.
